Showing posts with label Beautified. Show all posts

29 March 2012

Ch-ch-ch-changes!

So? What do you think??? Personally, I love it! I didn't want to stray too far from the old blog design {which I adored} but I still wanted something new and fresh.

This has been an ongoing process, and with my good friend Steph, we were able to make it happen. I did all of the design work and she did allllll of the HTML. I just love her and really don't know how she puts up with me. No really. I even told her that. After everything was uploaded this morning I said, and I quote straight from G-Chat...

i don't know how you put up with me
i'm such a PITA
but you always do and it always looks perfect
THANK YOU!

She really is the best. So Steph? Again... thank you.

Anyone that's interested in a fresh new blog design, should really check her out. She's offering $5 off any one of her blog designs for JFTB readers so be sure to contact her.

Oh, and let me know what you think!!

14 February 2012

Cold Weather Beauty


Thanks to Walgreens for underwriting this post. I was paid as a member of the Clever Girls Collective, but the content is all mine. Visit http://www.discoverbeautywithin.com/.

I think we can all agree that your beauty rituals vary slightly from season to season. In the summer, we're all worried about pretty feet & toes, bright summery colors, and that our armpits and legs are shaven everyday so we can wear appropriate clothing. But things are different in the winter. And today I just want to mention a few of my favorite cold weather beauty products.

First and foremost? I'm an Aveeno HOAR. I use Aveeno everything and swear by the stuff. I promise I don't work for them, I just really adore their products. And what's needed more in the winter than a really good lotion?

3

The only lotion I ever use is Aveeno with Cooling Action {formally known as "Cooling Menthol"} It is the greatest thing EVER. Because I played soccer my entire life, I developed extremely dry and sensitive skin on my shins {from years of wearing shin guards, I guess!} and I could not find anything that helped them. I went to 3 or 4 dermatologists and tried every cream and ointment out there before one of the doctors recommended Aveeno with Cooling Menthol. I really had nothing to lose at this point, so I tried it.

It cured me over night.

Since that time {about 10 years ago now, maybe?} I've never looked back and I tell everyone who ever brings up itchy dry skin or eczema to me. If you have this? Try it. It works.

So my love for Aveeno products has grown over the years and that's really all I use now. I love their face lotion {pictured above} foaming face wash, body wash, shaving cream and even their shampoo and conditioners are great!

My next favorite product is Essie nail polish in all their fun winter colors! I'm extremely anti-finger nail polish. I just HATE anything on my nails. I have really nice nails {if I do say so myself} and I just hate covering them up with polish. {And I'm too lazy to repaint them all the time when they chip.} So the only thing I really like to paint are my toe nails. Well this is my newest favorite color:

Wrapped in Rubies

1

It's a shimmery cross between a deep red and a deep purple. I'll spare you all a picture of my feet but trust me, it's gorgeous.

And last but certainly not least, this ThermalOn face mask has saved my life so far this winter. It's filled with tiny beads and you can heat the mask up in the microwave and it is heaven when you have a bad cold or sinus infection. Heaven.

4

Every time I wear it though, Carter and Brynn always come up and try to peek under my mask to make sure I'm okay. It may not be beautiful, but damn it saves lives. ;)

What are your favorite cold weather beauty products? I'd love to hear about them!!

08 December 2011

The art of eyeshadow.


Thanks to L'Oreal for sponsoring my post about my favorite beauty looks, tips and tricks! Check out Makeup.com for beauty advice from the experts.

While I'm certainly not claiming to be an expert on applying eyeshadow, I do often get questions/comments about how I do it, so I thought I'd share that with you today =)

Kindly disregard the scary faces I make when I put on make-up... Carter's even made comments to me about it. It's not pretty. Also? My camera battery died when I was trying to take pictures for this post, so I hope you can still get a sense of application from my iPhone pictures below...

When I apply make-up, I always concentrate on my eyes last. Not sure if that's what you're suppose to do, but we all have our routines, and this is one of mine. Here's a "before" shot...
I have some fun color palettes of eye shadow, but these are my go-to colors depending on what I'm wearing {browns or blacks}...On this particular day, I'm using all 4 colors in the brown palette on the left and then the white color in the black palette on the right. Yep... I'll be applying 5 colors total on my eyes. Here's how it works:
  1. The dark brown in the top left will be my liner {applied with a thin liner brush.}
  2. The color to the right of it {my absolute FAV} will be my base lid color.
  3. The color below that {bottom right in brown palette} I place on top of the base color to give it more shimmer/dimension.
  4. The deep purple color I use as a "highlight" color.
  5. The white color {bottom right of black palette} I use under my brows.
The first thing you need to do is apply the base color{s} on the bottom half of your eye {by "half" I mean halfway between your lashes and your brow.}
Once the base color is applied, I do the white color under my brows next...The next step is the highlight color {in this case the deep purple.} To apply this, I just put the shadow on the very tips of the brush and then sort of press it into the crease of my eye where the lid folds like this...
The next step is the use the thin liner brush to apply the darkest of your shadows {in this case the dark brown} along the top outer edge above and below your eye. In the pic below I have liner on my left eye {your right side in the pic} but not on my right eye {your left}...
You can kinda see how my left eye "pops" more.

Lastly, you apply mascara.... and viola, done. Here's a better pic of the layers of the shadow:
And the final product?
Again, I apologize for the cell phone pics, they're not the clearest, but I think you can still get a general idea of application! =)

Questions? Comments? Like my scary faces?

I was selected for this sponsorship by the Clever Girls Collective. Click here to learn more about Makeup.com or become a Facebook fan by clicking here.

14 July 2011

No heat curls. But with heat.

So I tried the "no heat curls" thing last night. And I didn't know how I felt about it until I walked into work this morning and was immediately jumped by my entire office exclaiming how gorgeous it looked. {Not me... just my hair.}

So, I guess I like it now? I don't know... ask me again after the rubber band mark on my forehead finally goes away.

Okay, so let me explain how this works. If you'd like an in-depth explanation {and have a lot of free time on your hands} then you can watch this 13-minute tutorial.

Or? You can just take the 45 seconds it requires to scroll through these pictures.

I thought so.

First, you have to shower. I know, I know.
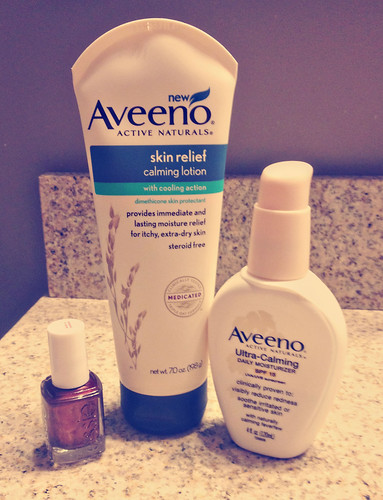
You can use product in your hair, or you can just blow dry it... completely up to you and how your hair holds curl. Here's what I used...
Yes, I have a slight Bumble & Bumble addiction.

After your hair is dry {don't be jealous of my fro}...
...then it's time for the elastic hair band.
HOTTTTT.

Next, you simply take a strand of your hair, and wrap it around the band and pull it through the other side. You will continue to do this all the way around.
{Curls in the front, party in the back, eh?}

Okay, so the first time I did this, I either didn't pull my strands through tight enough, or my hair is a complete pain in the ass {I think it's the latter} so I had to pull it out and start over.But? Look how fast it curled it. 10 minutes. And you can already see the hair band mark on my forehead {yes, after 10 minutes. I'm telling ya... it still hurts.}

Anyway, once your hair is finally all through, it looks something like this...
...which Bob thinks is a cross between an 80's lady, and a Greek goddess {though he threw in the Greek goddess thing at the last second. Thanks honey.}
Sweet. So, yeah... you sleep like that. All night. And if you're trying to keep your husband away, then try this. It will work.

When you wake up in the morning, you just take out the hair band and viola... curls.

BUT... not all of my pieces curled. Especially towards the side/back...
...so my "no heat curls"? Well, they ended up needing some heat.
Ahhh, much better.
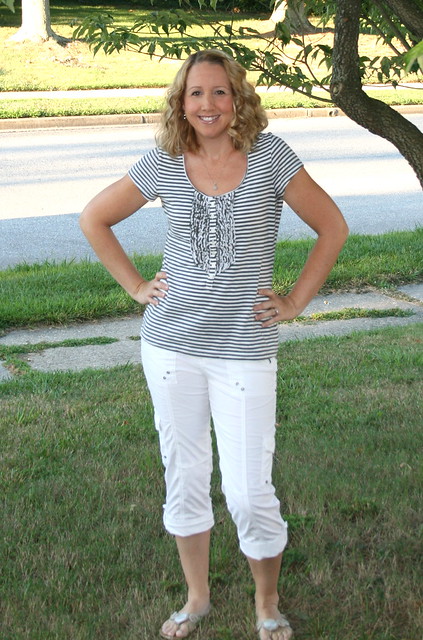
I decided to clip it back a little just to keep it out of my face. Here's what it looks like when I'm actually presentable {and not posting pictures of myself in my pj's with no make-up.}
IMG_7810
Curlzzzzz.
So yeah. Questions? Comments? It was fairly easy to do, and so far every single person that I've come in contact with today has said something to me, so I guess it looks nice?

I'm just trying to decide if this hair band scar on my forehead is worth it.

Guys?? We're #6!!
SIX!?! OMG!
THANK YOU. xoxo
Click To Vote For Us @ Top Baby Blogs Directory!

04 March 2011

And cause I don't want to leave you hangin...

Before... {sigh}
After...
...and I apologize for the scary and extreme close-up. I swear I lost 10lbs of hair {which will really help my diet!} and it just feels a million times better than before.

What do you think??

Click To Vote For Us @ Top Baby Blogs Directory!

03 March 2011

Chopped

As in... my hair. Today. At 2:30. I think I'll tack it on to the whole "new me" thing I got going on now.

I'm nervous, but I need a serious change. I'm thinking maybe 3-4 inches off and going back to all blonde {no low lights, as usual... just highlights.} I'm ready for spring.

So I just Google imaged for style options...
...until I realized that- even if I got the same adorable haircut at Jennifer Aniston- I will never look like her. About as close as I'll come is sharing the same name.

So I'm closing the browser hoping for the best.

I'll post pictures later. Wish me luck!

PS- Thank you for all of your wonderful and supportive comments on my post yesterday! So far so good... and I love all the food so far except for the oatmeal. But I don't like oatmeal so I wasn't too hopeful anyway ;)

Holding steady at #15... thanks for your votes!!
Click To Vote For Us @ Top Baby Blogs Directory!

13 October 2010

Random 101

This post is full of randomness. {Sorry.}

1. Like I said on Friday, I had a hair appointment this past weekend and got some much needed highlights. I also decided to get some auburn/copper low lights as well, ya know... for fall =)

Here's what I look like now:

Slightly less scary than before.

2. I went to the movies and dinner with my dad and sister on Saturday. We saw Easy A. I loved it. I thought it was hilarious and Emma Stone is adorable in it.

3. We went to Bugaboo Creek for dinner.
Apparently they have a reserved parking spot just for me. The steak was yummy.

4. Bob and I took advantage of the babysitting services offered by my mother and father-in-law on Sunday and got a LOT of housework done. Like I briefly mentioned before, Brynn's Baptism is on the 24th of October and we're having the party at our house afterwords. Our "to do" list is about 5 pages long {single spaced.}

We got SO MUCH done on Sunday... we:
  • Scrubbed the kitchen cabinets and cleaned them out
  • Cleaned the top of our fridge {we honestly had mail in that pile from 2006. What?}
  • Cleaned all the invitations/announcements, etc. from the side of the fridge
  • Cleaned the bathroom from top to bottom
  • Organized the kids clothes
  • Laundry. Laundry. And more laundry.
Whew... we feel so accomplished.

But the biggest "to do" of all, was staining and painting the new wooden railing on our steps. It took about 3 hours to stain the rail to match the floor and paint all the spindles with 3 coats of white paint. I wanted to shoot myself. But... alas, now that it's done, I absolutely LOVE it. Here are some pics...

"Before" {the real "before" picture would actually show white metal railings straight out of 1960 but I don't have a picture of them b/c we tore them out literally the day we moved in}:
After:
YAY! It only took 4 1/2 years.

5. Now that my 4 month old's weight dot is about 6 inches above the "100 percentile" mark on the graph {I'm not kidding... I should of taken a picture} it's time to start thinking about a convertible car seat.

Carter has a Britax Roundabout, which I LOVE, but the weight limit is only 40lbs {he's 35lbs.} I know they make a Roundabout 55 now, but I'm not sure if I should go with that, or just look into a different adjustable convertible/booster seat combo for Carter and give Brynn his "old" Roundabout.

I'm just starting to research my options, but wanted to hear your thoughts on this!

Okay... I think I'm done now.

post signature

Have you voted today? =)
Click To Vote For Us @ Top Baby Blogs Directory!

© jenni from the blog, All Rights Reserved.

Designed by A Grande Life